Friday, October 28, 2011

#328_Lemongrass Pork Adobo (Adobo with Tanglad)

Pork Adobo with Tanglad or Lemon Grass
Oppppsy!! I didn't have fresh lemongrass to garnish the adobo,
so I just used some sprigs of rosemary to break up the boring look of brown adobo.


My whole house smelled so aromatic while this adobo was simmering in the pot.
It smelled lemony from the lemon grass that I added into the adobo ingredients.
The 3 stalks was just enough to enhance the flavor of this basic adobo recipe.


"Dump Adobo"

There's a dessert called "Dump Cake", so-called because all the ingredients are dumped in a baking pan then thrown in the oven to bake. Incredibly easy! even kids can make this cake without any trouble (only if they're old enough and responsible enough to turn the oven on and off).

This adobo recipe is like the "dump cake" where you dump everything in a pot,
bring it to a boil then let it simmer.
Or... you can even transfer it in a crock pot to let it simmer.

Here's the recipe:
3-1/2 lbs. pork, cut up into chunks
(I used country style spare ribs which has lesser fat than pork belly)
1/2 cup soy sauce
1/2 cup apple cider vinegar
1 Tb brown sugar
1 can sprite, (my family's secret ingredient, now revealed)
5-6 cloves garlic, peeled then crushed
3 stalks lemon grass or tanglad, crushed*
1 Tb black peppercorns
3 bay leaves

Marinate the meat....
Put everything in large glass bowl, cover with plastic wrap and refrigerate for at least 3 hours up to overnight. (The picture shows the lemon grass, garlic, peppers, bay leaves are on the surface, but I stirred all of those ingredients together with the meat and the liquid)

Transfer the meat mixture into a pot, bring it to a boil, put lid on then simmer on low heat without stirring for an hour or until the meat is tender.
This is super, super easy to make and yet it is so delish.

KAIN NA!!


*NOTE:

Refer to this link, click here on how to cook with lemon grass.

Other Adobo Recipes:
Here are recipes for other variations of adobo :

http://pinoyamericanrecipes.blogspot.com/2008/10/fake-chicken-adobo.html

Monday, October 24, 2011

#327_Butterscotch Caramel Apple Cobbler

Here's an Apple Cobbler that has become our family's favorite dessert.
Everybody loves it, even the fussiest eaters.

I had modified a recipe that I got from a son-in-law, Carl's dutch oven recipe. His original recipe calls for 2 cans of apple pie filling. In this recipe, I used fresh apple pie filling instead because I have plenty of fresh apples that I want to use up. I also reduced the amount of butter and brown sugar so this is a little less sweeter than the original recipe.

Our son-in-law, Brian wanted this for his birthday
instead of a regular birthday cake.

And yes, he got his wish...a huge serving of it!


Ingredients:
4 lbs. apples, (about 10 medium) peeled, cored and sliced thin or cubed
1 Tb ground cinnamon
3/4 cup brown sugar

1 tsp ground nutmeg

1/4 cup flour


1 cup chopped pecans
1/2 stick butter

1/2 cup brown sugar


1 jar butterscotch or caramel topping

1 box white cake mix

1/2 stick butter melted

1 can sprite


Apple Filling:
Combine brown sugar, flour, cinnamon and nutmeg then toss in the apple slices to coat. Set aside.

Praline: In a saucepan melt sugar and butter over medium heat; stir in the chopped pecans, then spread mixture into a buttered 10"x15"x 2" baking dish.

Layer the following:
Spread apple filling, including its juice, on top of the praline (nuts, sugar and butter)

Spread butterscotch topping on the apple pie filling.
Spread the dry cake mix evenly on the caramel topping and drizzle with melted butter.
Pour a can of sprite over top of cake mix.
Bake in a 350 degrees pre-heated oven for 1 hour.
Serve warm with vanilla ice cream.


This is really good served warm with Vanilla Ice Cream.

Wednesday, October 19, 2011

#326_Pan de Pao, Pan de Queso & Pan de Sal

One dough, 3 ways....
Pan de Pao
(According to MaMely)

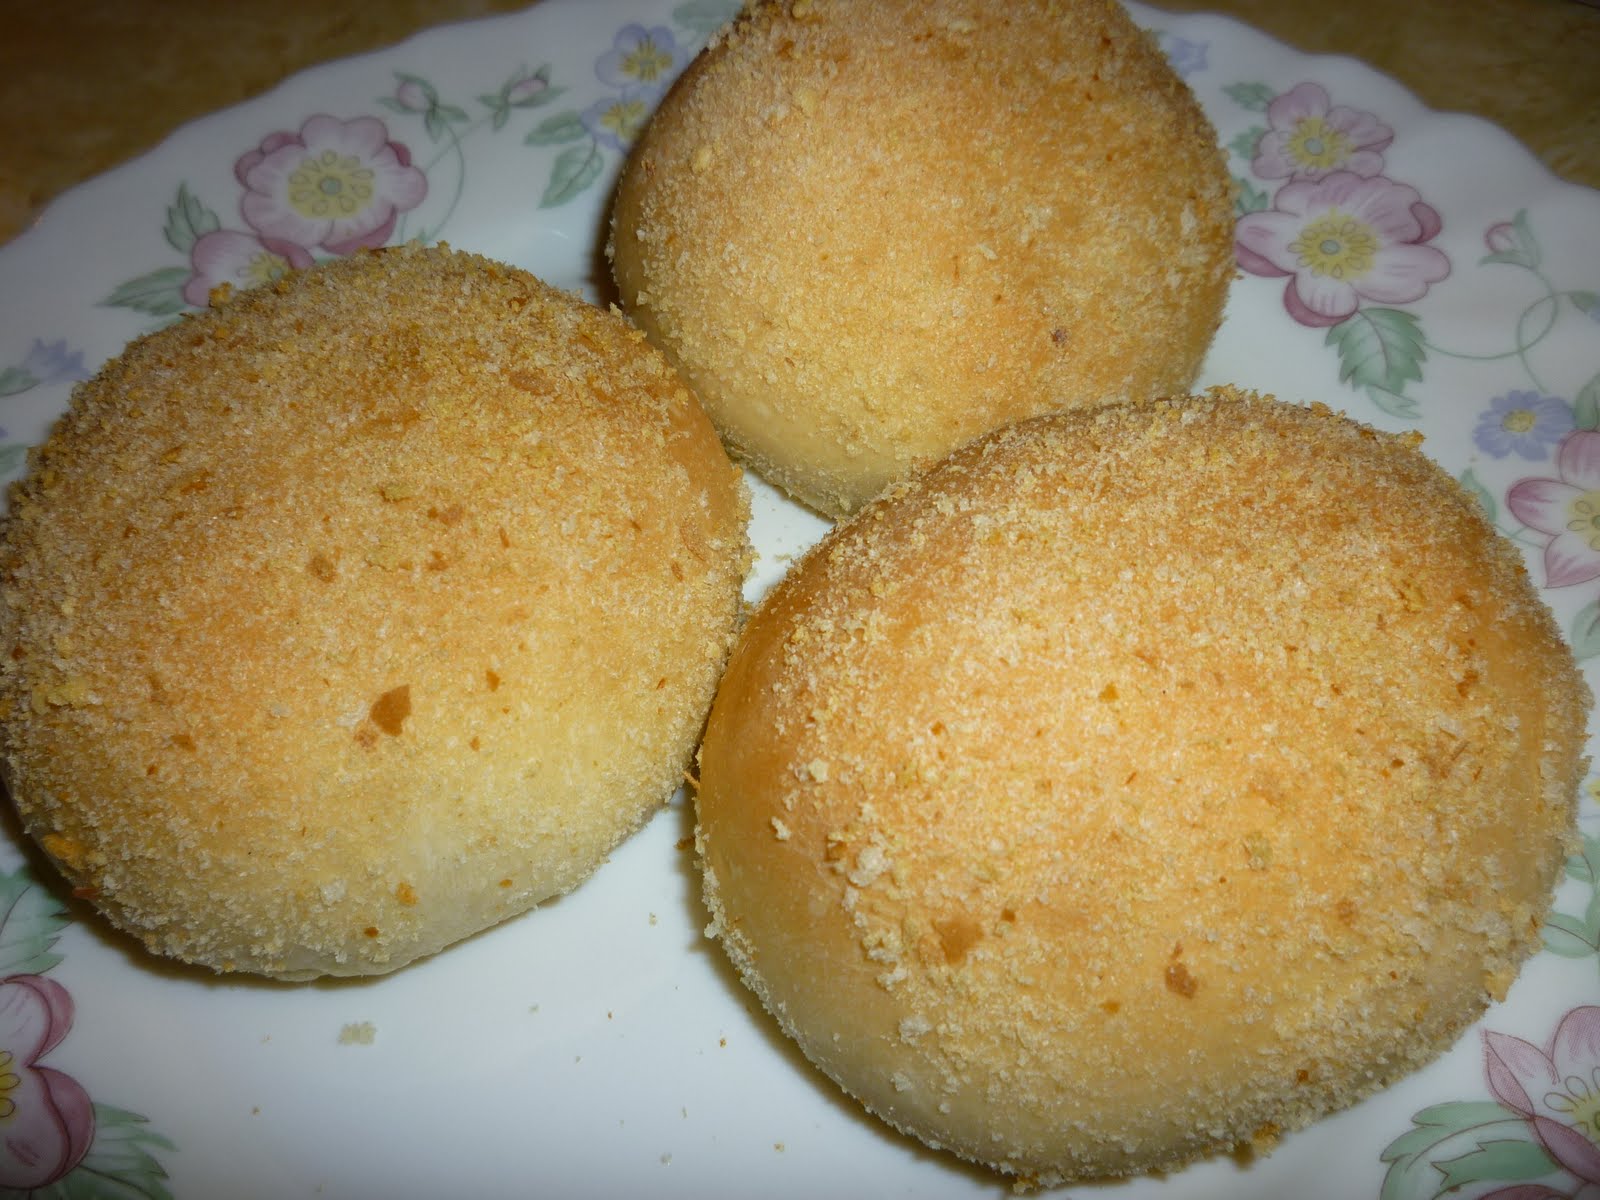
I'm absolutely sure most of you have heard of Siopao ( steamed buns) and Puto Pao, but have you ever heard of Pan de Pao yet? Probably not... I know, because I just made that name up. We can also call this "Chicken Adobo Pan de Sal" because that's what it actually is... Pan de Sal stuffed with Chicken Adobo.

As I was making some Pan de Sal today, I noticed some left-over Chicken Adobo in the fridge, so I thought I better use it before it goes to waste....and the result is my amazing Pan de Pao. It's really nothing but baked Siopao (meat roll, see post #73, click here), only with the Pan de sal signature look which is the bread crumbs on the bread, but somehow, the whole thing is like a totally new kind of bread. This is probably because it is half Pan de Sal and half Siopao which is an excellent combination. I don't usually rave about my own cooking, but this one gets a high mark.


Click here for the Pan de Sal recipe.
Click here for my Chicken Adobo recipe.

For the filling I heated up the Chicken Adobo in a saucepan,
sprinkled some sugar and mixed in some cornstarch dissolved in cold water
to thicken the sauce.


Hope you'll give this a try next time you make some Pan de Sal.


Pan de Queso or Cheese Buns

How about Pan de Queso or Cheese Buns? this isn't new at all as I got the idea from an old cook book, but the original name of the recipe is Cheese Bread. I kneaded in some grated sharp cheddar cheese and a little bit of Parmesan cheese into the dough, then shaped them into mini bread. Tossed the shaped dough into some bread crumbs. I then used the rest of the dough to make regular Pan de Sal.

There you go.....from one dough you can make 3 different kinds of bread, hence, one dough, 3 ways.

Tuesday, October 18, 2011

#325_Tomatoes with Eggs

In my previous post, recipe #324, (click here), the eggs and tomatoes are cooked together with bagoong na alamang (shrimp paste), a very Pinoy way to make a tomato dish.
In this recipe here, I am using the basic sauteed tomato and then topped with Sunny Side Up Eggs, a recipe I learned to make from my daughter-in-law from Texas who is Spanish-Mexican. They call it
Tomates con Huevos in Spanish. She loves to eat this with toasts.

I know, this is not a perfectly fried Sunny Side Up egg,
but it is the way I like it....no runny yolk for me.


This is quick and simple way to serve eggs and tomatoes and there isn't really a measurement here, but for just one serving you can use 1 small tomato and make sure that it is ripe. Saute some chopped garlic, onion and tomatoes, in that order, in olive oil or canola oil. Season with salt and pepper. Spoon mixture on a plate then place Sunny Side Up Egg on top.
Serve with plain toast bread or toasted garlic bread.

For home made garlic bread, go to post #274, click here.

Update:10-19-11
For some reason I had a flashback about the tomato side dish that we used to have in Pangasinan. I just barely recalled how we eat the tomatoes mixed with alamang na bagoong with itlog na maalat (salted eggs) then with a particular seaweed we call in Pangasinan as "arurosep". I copied a picture from Flicker so you can see what I'm talking about. I don't know what it is called in Tagalog or in other dialects. Anybody have a name for it?

http://farm5.static.flickr.com/4067/4331948934_7271ecd252_z.jpg
This is "Arurosep" in Pangasinan

Tuesday, October 11, 2011

#324_Sauteed Tomatoes with Eggs

Ginisang Kamatis na may Bagoong na Alamang at Itlog

I can probably call this "Binagoongang Kamatis with Eggs" too
since it has some bagoong na alamang or shrimp paste in it
just like Binagoongang
Baboy.

This stuff is really good specially when paired with pork chops or fried tuyo or tinapa or even by itself on top of rice. I have a friend who enjoys hers on a piece of toasted bread or as a filling for pan de sal....palaman sa tinapay. I have yet to try that.

The only negative part of cooking this dish is that it makes my whole house stinky because of the pungent smell of bagoong even with the air purifier on, lit candles and exhaust fan on and windows open. This time I have a new discovery which helps get rid of the smell a little bit. In addition to the above mentioned tricks, I had a simmering pot of water with cinnamon sticks and orange peel on the stove right next to the wok I'm cooking this dish on. Although this trick doesn't completely take out the pungent smell, it helps a little.
To my non-Filipino readers, I hope this doesn't keep you from trying this dish because it is only during the cooking process that the bagoong somehow emits its aromatic, savory and pungent smell. After it has been cooked it doesn't smell at all any more.

Ginisang Kamatis na may Itlog at Binagoongang Baboy,
super good with Garlic Fried Rice


Here's the recipe for the
Sauteed Tomatoes with Bagoong na Alamang and Eggs

The following ingredients are just guesstimate.

For 5 lbs. ripe tomatoes, you'll need:
1 head garlic, minced
1 large onion, chopped finely
Canola Oil
1/3 cup Bagoong na alamang (shrimp paste)
5 eggs, lightly beaten

1) Peel skin off the tomatoes, then cut in half across. Squeeze out the juice and the seeds then chop them up.
2) In a large skillet, heat some oil
3) Lightly brown the garlic
4) Add the onions and continue to saute until they're translucent
5) Stir in the chopped tomatoes and continue to saute. Let simmer, stirring occasionally, for about 3o to 45 minutes until the the liquid has reduced to almost dry.
6) Stir in the bagoong until well blended.


7) Gradually pour in the eggs while continually stirring to avoid the eggs to set before it is thoroughly blended with the tomato mixture. Continue to simmer, stirring constantly until the mixture becomes thick and the eggs are fully cooked, about 10 minutes.

ENJOY!!

#323_How to Freeze Corn

I like to freeze corn when they are in season and only when they are cheap, so that I will have them handy to make "Ginataang Mais", even in the Winter and Spring time. It's a very tedious process specially if you're doing a bushel of them, but I only freeze just enough for making Ginataang Mais which only calls for 3-4 ears of corn per recipe. (click here for the recipe)

I learned this process from an acquaintance, Mrs. Scharffer, one day while she was freezing corn from their own harvest.


Here's how to freeze corn:

First off, shuck the husks and take the silks off the corn.

In a huge pot, bring water to a rolling boil, then carefully drop the halved corn on the cob. (you'll find out later why I cut them in half). Bring the water back to a boil then begin timing for 4 minutes.


After 4 minutes, take the corn on the cob from the boiling water and let them cool in ice cold water for about 10 minutes. Put them in a colander to drip.


The reason why I cut the corn in half so I can have them stand on the flat end and stay steady on the board and not wobbly when cutting them.


Place the corn kernels in plastic bags, label and freeze.

Thursday, September 29, 2011

#322_ Apple Cake II

I already posted a recipe for an Apple Cake that is so good, click here, but I have
another one that I have always wanted to test
to see if it is as good because the picture of the cake that accompanied the recipe looks so temptingly good. The recipe is from Red Book magazine that I clipped a couple of years ago. So when a friend shared with me some of her fresh apples from her tree a week ago, I knew what I was going to do with them....try that recipe.

Here's the recipe that I adapted from Red Book magazine. I don't know why, but I ended up slightly tweaking the recipe (indicated by red asterisk).
1 cup walnuts, roasted and chopped*
1/4 cup brown sugar*
2 tsp. ground cinnamon
dash ground cloves*
2 Tb flour
5 large baking apples, peeled, cored and sliced*
3 cups less 2 Tb, all purpose flour*
1 Tb baking powder
1 tsp. salt
1-3/4 cups white sugar*
1/2 cup canola oil
1 stick unsalted butter, melted
4 large eggs
1/2 cup golden raisins*
1/4 cup orange juice
2 tsp. vanilla extract
Butterscotch Caramel topping*

Baking Direction:
1) heat oven to 350 degrees. Spray a 10-inch removable bottom tube pan with cooking spray. Sprinkle nuts evenly on bottom of pan.
2) In a bowl, mix 2 TB flour, brown sugar, cinnamon and cloves. Add apples and toss to combine.
3) In another bowl, mix all purpose flour, baking powder and salt. Set aside.
4) In large bowl, cream together white sugar, oil and butter. Beat in the eggs one at a time. Stir in the orange juice, vanilla then the flour mixture. Beat until the batter is smooth. Fold in the raisins.
5) Pour half of the batter into prepared pan. Arrange half of the apple mixture on top of batter. Spoon remaining batter over the apples and top with the remaining apples.
6) Bake 1 hour and 20 minutes or until a tooth pick inserted in center of the cake comes out clean. Let cake cool in the pan on a wire rack for 3 minutes. Run a knife around the sides of cake and turn the cake out onto a wire rack. Invert cake onto another rack to cool.
7) Drizzle caramel sauce on the entire cake or on each slice.


Slice apples thinly or into small chunks


The batter should be like that of a banana bread


Sprinkle nuts evenly in the tube pan


Let cake cool on a wire rack for about 30 minutes before slicing.


This is the bottom of the cake


The finished product is very similar to the other recipe from Cooking Light magazine.
The main difference is the cream cheese and the method of preparation.

Hope you give this recipe or the other one a try...they are both good!!

*************************
Update 10-11-11
The original recipe link:

A friend on facebook requested that I post the link for the original recipe. What I have is the recipe I clipped from the Red Book magazine, but I googled it anyway to see if they have it on their site. So here's the recipe found on their website, click here. It is exactly the same recipe as it appeared in their magazine.

******************************

Addendum 10-11-11

I made this Apple Cake today in a 9"x13" but replaced the orange juice with 1/2 cup of plain yogurt because I ran out of orange juice, then I mixed everything together like the procedure in making banana bread, combining wet and dry ingredients together. It only took 45 minutes to bake it. It is very easy to prepare and it turned out real good, in fact it is better than the original recipe and I think this is my favorite. Next time I will make some muffins with this recipe.


Monday, September 26, 2011

#321_Doughnut Muffins: Muffins that Taste Like Donuts

Mini Donut Muffins

A few weeks ago some people were raving about this
doughnut muffins on facebook.
I was so intrigued that I made some research on the net
and checked out recipes from several sites,
and to my amazement,
every single one of them raved about how good they are.
So I made a batch for a party.


These are muffins that supposed to taste like doughnuts.

I must have done something wrong when I made these
because there was no trace of doughnuts in them.
It is absolutely a good recipe though, cross my heart...
it's just that I was
looking for the doughnuts in the muffins.
I followed everything on the recipe except
I used mini muffin pans with 24 cavities,
instead of the regular ones.
I was glad I was able to make 8 of those which totaled 192 mini muffins,
which was great for the crowd we had.

I will try to make this recipe again, hoping to find
the donuts in them the second time.


Got the recipe here.


Here are 2 links you can get the recipe from:

http://allrecipes.com/Recipe/Doughnut-Muffins/Detail.aspx

Friday, September 23, 2011

#320_Chicken & Squash in Tomato Sauce

Chicken with Squash

I learned to make this dish from my daughter-in-law from Texas
who is a half Mexican and half Spanish (as in Spanish from Spain).

Having a tomato base similar to Afritada,
this dish has a real Spanish influence.

Ingredients:
2-chicken breast, rinsed and cup up into chunks
(or whole chicken, cut up)
1-medium Acorn Squash (or any kind of squash), cubed
1-med onion
3-very ripe tomatoes, chopped
(can use canned tomatoes)
3-cloves garlic, minced
canola oil for sauteing
2 - 8 oz cans tomato sauce
1 cup water or broth
2-Jalapeno pepper
Salt/Pepper to taste

This is another dish that I make without measuring the ingredients.
So the ingredients above are just for your guideline.

Saute garlic, onions and tomatoes in canola oil. Add in the chicken and saute really well until they render their own fat. Season with salt. Stir in the squash, tomato sauce and the jalapeno pepper. Put lid on and simmer for about 15 minutes then add water or broth; continue to simmer until the chicken is tender. I like to mash some of the squash during the process as it makes the sauce a little thick. Add some more liquid (broth or water) when necessary, otherwise, its done!!

ENJOY!!!

Note from MaMely:
My daughter-in-law usually makes this dish with just chicken breasts, but I prefer dark meat over the breasts so I make this with cut up whole chicken then I just use the dark meat and freeze the breasts.