Showing posts with label Dessert. Show all posts

Monday, October 24, 2011

#327_Butterscotch Caramel Apple Cobbler

Here's an Apple Cobbler that has become our family's favorite dessert.
Everybody loves it, even the fussiest eaters.

I had modified a recipe that I got from a son-in-law, Carl's dutch oven recipe. His original recipe calls for 2 cans of apple pie filling. In this recipe, I used fresh apple pie filling instead because I have plenty of fresh apples that I want to use up. I also reduced the amount of butter and brown sugar so this is a little less sweeter than the original recipe.

Our son-in-law, Brian wanted this for his birthday
instead of a regular birthday cake.

And yes, he got his wish...a huge serving of it!


Ingredients:
4 lbs. apples, (about 10 medium) peeled, cored and sliced thin or cubed
1 Tb ground cinnamon
3/4 cup brown sugar

1 tsp ground nutmeg

1/4 cup flour


1 cup chopped pecans
1/2 stick butter

1/2 cup brown sugar


1 jar butterscotch or caramel topping

1 box white cake mix

1/2 stick butter melted

1 can sprite


Apple Filling:
Combine brown sugar, flour, cinnamon and nutmeg then toss in the apple slices to coat. Set aside.

Praline: In a saucepan melt sugar and butter over medium heat; stir in the chopped pecans, then spread mixture into a buttered 10"x15"x 2" baking dish.

Layer the following:
Spread apple filling, including its juice, on top of the praline (nuts, sugar and butter)

Spread butterscotch topping on the apple pie filling.
Spread the dry cake mix evenly on the caramel topping and drizzle with melted butter.
Pour a can of sprite over top of cake mix.
Bake in a 350 degrees pre-heated oven for 1 hour.
Serve warm with vanilla ice cream.


This is really good served warm with Vanilla Ice Cream.

Monday, June 27, 2011

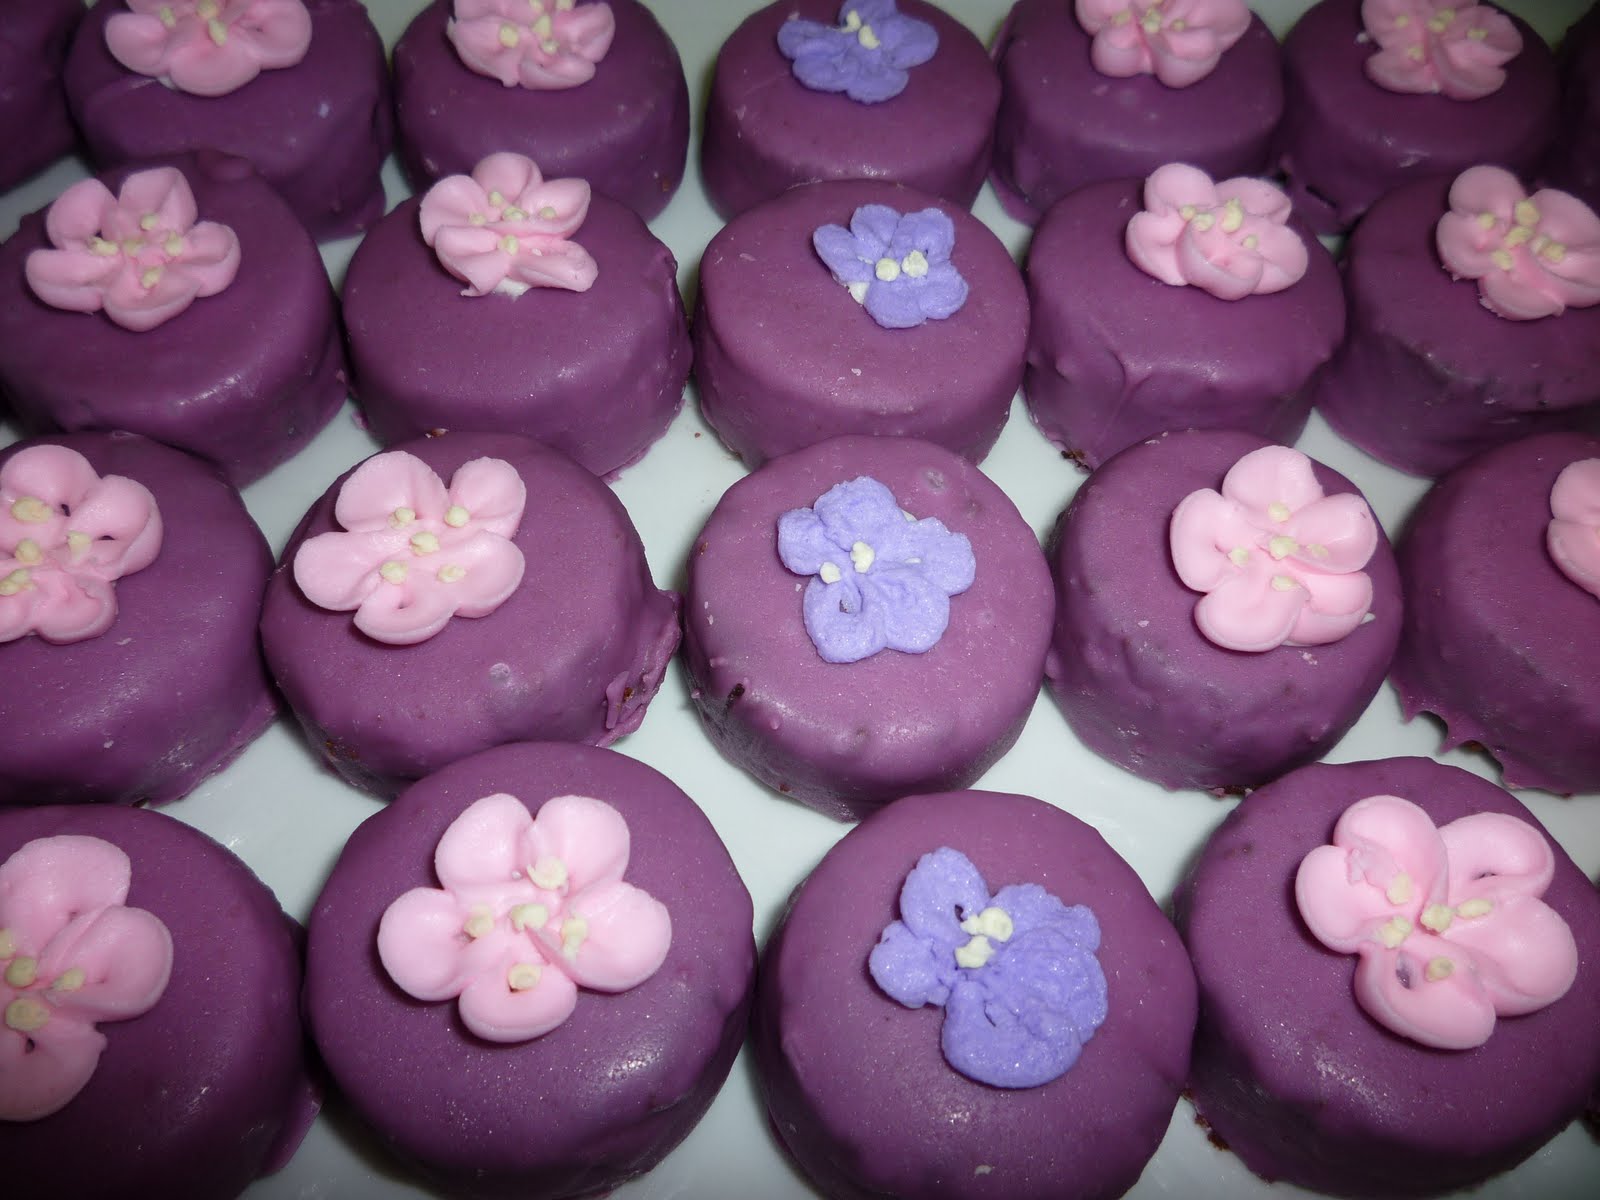
#309_Petit Fours: Sweet & Petite

Petit Fours
Pronounced, peh-tee-foo-rh

Sweet & petite....these are darling for Baby Showers,
Cocktail Parties, Bridal Showers
or any special occasion.


These are actually Mini Cakes

Although these bite-size cakes look like Petit Fours, I didn't make them the way you'd normally make Petit Fours, instead, I made them the way I make Cake Balls, click here. This way I can decorate them with some cute sugar flowers I just learned to make at the Cake Decorating Class.
So these are actually "Mini Cakes".....flat version of Cake Balls or Cake Bites.


Assuming that you've already checked out the steps on how to make the Cake Balls,
(http://pinoyamericanrecipes.blogspot.com/2009/03/cakeballs-and-cakesicle.html)
Here's the rest of the procedure for making this Petit Four-like Mini Cakes:
After mixing the cake with frosting, I pressed the cake on a pan
and used a cookie cutter with 1" diameter to cut/mold the cakes.
You can also cut the cake into little squares.
Freeze the cut cakes (or molded cakes) before dipping them in the melted chocolates.

HAVE FUN MAKING THEM!!

Sunday, June 19, 2011

#306_Father's Day2011: Hubby's Favorite Desserts

For Father's Day I made hubby his top 3 favorite desserts.....
gotta spoil the big guy a little ya know because he is special.

1. No-Bake cheese cake. (For recipe, click here)
2. Strawberry Pie (for recipe, click here)
3. Hummingbird Cake. (For recipe, click here).


Beignet Strawberry Shortcake for the cook.
(For the Strawberry Shortcake recipe click here.)


Chicken Salad Sandwich Fillings in Bread Cones

To make the Bread Cones, click here
For Chicken Salad sandwich filling, click here.


Grandson loved all of the above!!
Yum-O!!!

Sunday, June 12, 2011

#305_Easy as 1-2-3 Strawberry Pie


 With Mamon as Cake Base


This dessert only takes 5 ingredients including the water
to make the strawberry glaze!!
It's the easiest pie I've ever made!!


 Strawberry Pie topped with Whipped Cream


Here's the recipe:1 box of strawberry flavor Danish Dessert
cooked in 1-1/2 cup water.
Follow directions on the box for making glaze, then let cool.


1-Graham Cracker pie crust

1-1/2 lbs. fresh strawberries, rinsed, hulled and sliced
Cool Whip, or whipped cream.

Mix the sliced strawberries with the cooled glaze
then pour onto the pie crust.

Chill in the fridge for at least 2 hours before serving.
Top with cool whip.
Quick and easy, but also delicious!!

Enjoy!!


Note from MaMely:
For better result, brush pie crust with egg wash then bake in a 350 degrees pre-heated oven for just 4 minutes. Let cool completely before filling.

Wednesday, April 27, 2011

#291_Thai Mango-Sticky Rice

Thai Mango Sticky Rice
A guest at a dinner party I went to just recently brought this delicious dessert (picture above) with some coconut sauce in a separate container for the topping. The guest who brought it was actually a Filipina who grew up in Thailand, so there should be an authenticity in her dish. Too bad she left early so I was not able to ask for her recipe....maybe, she knew I was going to so she left early... just kidding.

I wanted to replicate that dessert so bad so I browsed the net and found many different recipes out there, so it was a little hard to choose which one would be close to the kind I tasted at the party. Fortunately, I am able to put a recipe together.....

This dessert is a "cousin" to our very own
"Biko" or is a variant of Biko or vice versa (click here for my post on Biko). The reason I said that is because they share common ingredients, i.e. glutinous rice or sticky rice, coconut cream and sugar, but the method of preparation is different from each other thereby resulting to different end products.

Here's what separates the two:

First, the consistency of the Thai sticky rice is so moist, as the rice is saturated with coconut sauce. Whereas the Philippine Biko is drier as we cook the rice a little passed "al dente" stage, which means the rice grains are soft and yet firm. Second, the Thai sticky rice uses coconut sauce for toppings, whereas the Philippine Biko is topped with "latik" ( "ganusal" in Pangasinan), or sometimes topped with toasted flaked coconut. In other words, Thai sticky rice is wet that you have to scoop the rice out with a spoon while the Philippine Biko is dry, and can be sliced. Both kinds are very good.


Thai Mango Sticky Rice, a.k.a. Biko con "Sabaw"

I made this dessert using both white glutinous rice and purple rice

and they turned out really good.
The purple rice is maybe another cousin...
maybe a third cousin. (*..")wink, wink!


Here's my take on this recipe which tastes
so close to the one I tasted at the party....


Rinse and soak 4 cups of glutinous rice in water overnight.

Cook sticky rice either by steaming method or rice cooker method.(to cook rice in rice cooker,
refer to my post on Biko, recipe #7, click
here)

While the rice is cooking make the Coconut Sauce:
Sauce 1:
1-1/2 cans coconut cream
1/2 cup white sugar
1/4 tsp salt
Cook this mixture in a pan over medium heat,
stirring until sugar is dissolved.

Stir in 1 tsp vanilla extract, a secret ingredient

Spread cooked rice on a dish and pour Sauce 1 over it.
Let the sauce soak into the rice.
(can also stir/mix sauce and rice together)

Sauce 2:

1/2 can coconut cream
1/4 cup sugar
dash salt
1 tsp Tapioca starch dissolved in a little bit of water.

Put ingredients in a sauce pan and cook over medium heat, stirring
until sugar is dissolved and sauce is thickened a little bit.
Add a 1/2 tsp of Vanilla extract....or a drop or 2...
that's a secret ingredient.


(Note1:this sauce won't get too thick, it is just slightly thicker than Sauce1. The 1/2 tsp of tapioca starch is just enough to give the sauce a little body to consistency of the sauce.

To serve the Sticky Rice, scoop up the cooked rice
with an ice cream scooper onto a platter,
then pour Sauce 2 over rice. Arrange mango slices along side.


Note: the amount of coconut milk and sugar to use in this recipe
is totally a personal preference.
If you want this dessert to be sweeter,
then add more sugar,

if you want to use more coconut cream,
there's nothing wrong with that either.


Another option on serving this dessert is to
put Sauce 2 in a separate bowl

and place it along side the plate.

******
Here's a simpler way to make the Coconut Sauce:
Pour 2 cans of coconut cream in a sauce pan, then add 3/4 cup sugar and 1/2 tsp salt. Bring to simmer over medium high heat, stirring until sugar is dissolved. Take out about 1-1/2 cups of the sauce into a bowl. Set aside....This is Sauce 1

Dissolve the Tapioca starch in a little bit of water and mix it in with the remaining coconut sauce in the pan, continue to heat it up, stirring, until the sauce is slightly thickened....
This is Sauce 2.
Don't forget to add in the secret ingredient!

Steamed Glutinous Rice
I will be posting "how to steam rice" in another entry.


FYI...this is the best kind of mango to serve with this dessert.

Update 5-2-11...See post on how to steam rice with an improvised steamer, click here.

Related post from this blog: other ways to serve Biko:
http://pinoyamericanrecipes.blogspot.com/2009/08/biko-with-mango-jam-topping.html http://pinoyamericanrecipes.blogspot.com/2009/08/165biko-mango-custard-sushi-style.html

Monday, April 25, 2011

#289_Hummingbird Cake

Hummingbird Cake
I'd simply call this Banana Pineapple Cake


This cake is very similar to the Carrot Cake recipe #237, click here,
the main difference is that the Carrot Cake has of course, carrots
while the Hummingbird Cake....no, it does not have hummingbirds in it,
but has pineapple and bananas! Amazing!
Then why is this cake called Hummingbird cake
if it's not made with the bird?

To read about the legend of this cake go to this link below:
http://ezinearticles.com/?Legend-of-the-Hummingbird-Cake&id=1119079


A bite of this cake will make you want to sing/hum
like a Hummingbird (^..*)


I usually don't brag about the outcome
of my cooking or baking adventures,

but I can't help to tell my readers here that this one came out so good.
Yes, so good that my dear hubby was so delighted with it that
he was the one who bragged how good it was
to the family and guests at our Easter dinner.

Now, he has listed this dessert on his top 3 favorites.
His other favorites are No-Bake Cheese Cake and the Carrot Cake.


I adapted this recipe from from Oprah.com.
with a little bit of plus and minus in the ingredients.
In other words, I modified the recipe
and made it a little like a spice cake. It's really an easy recipe to make,
basically combining the wet and dry ingredients together.

Toasting the Nuts
Spread 2 cups of nuts (pecans or walnuts) on a baking sheet and
bake in a 350 degrees pre heated oven until they become fragrant,
about 8-10 minutes. Let cool, then roughly chop. Set aside.

Preparing the pans:

Grease bottom of two 9" round pans with shortening,
then line with parchment paper. Grease the papers.

Dry ingredients:
3 cups all purpose flour
1 tsp. baking powder
1 tsp. baking soda
1/4 tsp. ground cloves
1/4 tsp. ground nutmeg
1 Tbsp. ground cinnamon
1 tsp salt
Combine all of the ingredients in a bowl,
then stir using a wire whisk (or sift them together)
to blend the ingredients together.
Set aside.

Wet Ingredients:
1 cup canola oil
1 cup brown sugar
1 cup white sugar
3 large eggs
1 tsp vanilla extract
1/2 can pineapple tidbits, drained,
then reserve 1/2 cup of the juice

2 large bananas, chopped

Procedure:
In a bowl, combine the bananas and pineapples. Set aside.
In another bowl, cream together canola oil and the sugars,
then beat in the eggs, one at a time.
Stir in the reserved pineapple juice and the vanilla extract.

Mix in the dry ingredients and 1 cup nuts.
Stir until everything is just blended together.
Blend in the pineapple/bananas.
Do not over mix.

Pour batter evenly between the prepared pans.
Bake in a pre-heated 350 degrees oven for 35-40 minutes.
Let cool completely before frosting the cakes.

Cream Cheese Frosting:
1 stick butter, room temperature
1-8oz. cream cheese, room temp.
4 cups powdered sugar
Zest of 1 lemon
2-3 Tbsp milk
1 tsp. vanilla extract
(add more milk if necessary to achieve a spreading consistency)
Beat butter and cream cheese until smooth. Beat in powdered sugar and gradually add milk and vanilla. Continue to beat until creamy and spreadable.

To assemble the cake:
Place one cake, top side down, onto a serving platter. Spread with about 1/3 of the frosting. Place the other cake layer onto the frosted cake and spread the rest of the frosting over top and sides of the cake. Garnish with the rest of nuts. Chill for a few hours before slicing the cake.

ENJOY!!!

Note from MaMely:
I want to make sure there's not more than 1/2 cup of pineapple juice used in the mixture, so I thought draining the pineapple then saving 1/2 cup would be playing safe.

Monday, April 4, 2011

#285_Fruit Salad with Buko

Fruit Salad with Buko
(Buko is young coconut)

My friend, Lisa made this fruit salad for her dinner party
last weekend and
she sent with me a big bowl of it
so now I have pictures to post here.
I didn't bother to ask her how she made it because
I was pretty sure she made it the same way I do.

It's really good! Thank you, Lisa!!


This is an all-time Filipino favorite dessert and is prepared by combining different kinds of canned and bottled fruits. Some people add some cheese to it, which I don't care for at all.

Here's my favorite fruit combination:
2 cans (15.25 oz. ea.) Fruit Cocktail, well drained
1 bottle Nata de Coco, well drained*
I can Buko, well drained (young coconut)**
Fresh green grapes
Fresh peaches, cubed
(ripe Manila mangoes instead of peaches would be great if available)

For the Fruit Dressing:
Mix 1 can of condensed milk and 1 can of Nestle Cream
then lightly stir in with the fruit.
Chill for several hours before serving.

Here's my husband's favorite Fruit Medley:
Mix and match:

Fresh peaches
Fresh strawberries
Fresh red and green grapes
Fresh raspberries
Fresh cantaloupe
Fresh Honeydew
Fresh bananas
or mix and match any fresh fruits available or in season.
Topped with freshly-whipped cream (heavy cream + sugar)

Another option for Fruit Dressing for fresh fruits:
2 cups fresh orange juice + 2 Tbsps. cornstarch.
Cook until thick enough to pour over fruits.

Notes from MaMely:

*Nata de Coco are available in red, green colors and natural.
**
Of course if you're in the Philippines or a place where Buko or young coconuts are available, you don't need to use the canned ones.

Sunday, November 7, 2010

#257_Very Moist Apple Cake


When neighbors give you apples.....
make this moist and delicious
Apple Cake

I adapted this recipe from Cooking Light, but I tweaked it a little bit by adding some ground cloves and walnuts and used butter instead of margarine. I also increased the amount of ground cinnamon and glazed the cake with apricot jam after taking it out of the oven. This recipe is a must try.

Here's my modified version....

Ingredients:

1-1/2 cups brown sugar
1/2 cup stick butter, softened
1 tsp vanilla extract
6 oz. cream cheese, softened
2 large eggs
1-1/2 cups all-purpose flour
1-1/2 tsp baking powder
1/4 tsp salt
1 tsp ground cinnamon
1/2 tsp ground cloves

1/4 cup brown sugar
1 tsp ground cinnamon
3 cups peeled, cored and chopped apples (about 2 large)
1/2 cup walnuts, chopped and toasted

Cooking spray

Preheat oven to 350°
Beat 1-1/2 cups sugar, butter, vanilla, and cream cheese at medium speed of a mixer until well-blended (about 4 minutes). Add eggs, one at a time, beating well after each addition. Combine flour, baking powder, ground cloves, 1 tsp ground cinnamon and salt. Add flour mixture to creamed mixture, beating at low speed until blended.

Combine 1/4 cup sugar and 1 tsp. ground cinnamon. Take 2 tbsp cinnamon mixture and combine it with the apple in a bowl, and stir this (apple) mixture and nuts into the batter. Pour batter into an 8-inch spring form pan coated with cooking spray, and sprinkle with remaining cinnamon mixture.

Bake at 350° for 1 hour or until the cake pulls away from the sides of the pan. Cool the cake completely on a wire rack, and cut using a serrated knife.

Note: You can also make this cake in a 9-inch square cake pan or a 9-inch spring form pan and adjust baking time.

Tuesday, June 22, 2010

#247_Mango Cake Roll


I really don't have much time nowadays to blog so I've just been posting pictures of food that I make and recipes from friends on facebook.
Yesterday, after I posted this picture of Mango Cake Roll on my facebook page, I received several requests for the recipe. I appreciate you ladies for your interest on the recipe.

You'll be surprised to find out that I just combined some recipes that I already have to create this dessert. So, here it is....

For the cake,
I used my recipe for the Chiffon Cake as I did with the Ube-Macapuno Cake Roll, click here,
For the cream filling, I used the same cream filling for the Fruit Tart and Crema de Fruta.

Mango Cake Roll
Mango and Cream Filling.
1 box (3.3 oz ) instant white chocolate pudding mix

1 box (3.3 oz) instant lemon pudding mix
2 cups cold milk
1 package cream cheese, room temp. soft
4 cups of ripe mangoes, cubed

In a bowl beat cream cheese and set aside. In another bowl, beat the 2 boxes of pudding and milk until thick, (food processor works best for this part) Add the cream cheese and continue to beat until mixture is smooth. Consistency should be like mayonnaise. Fold in the cubed mangoes. (this recipe is for 2 cake rolls)

For the Cake, Chiffon Cake recipe #210, click here.
1) Make the batter for the cake following the directions on the Chiffon Cake recipe.
2) Grease 2 jelly roll pans then line with parchment papers, then grease the papers.
3) Equally spread the batter on the parchment paper-lined pans.
4) Bake in a pre-heated 350 degrees oven for 15-18 minutes for each pan.
5) Follow directions in rolling jelly roll before spreading the Mango and Cream Filling on the cake.
6) chill in the fridge for at least 2 hours before slicing and serving.

Note from MaMely:
If making the Chiffon Cake batter is somewhat complicated for you, watch this video which gives you very simple recipe for jelly roll cake and a step by step procedure of rolling the cake.

Here's a link on how to make jelly roll cake http://video.about.com/baking/Jelly-Roll.htm


This is the kind of mangoes that works best for this dessert. If you live in Pinas, there won't be any problem looking for good mangoes.


When time permits, instead of using pudding for the cream filling, try making the real pastry cream, just as what I've used in several desserts below.
Incredible Mango Tart, recipe #160, click here,
Irresistible Mango Custard Pizza Pie recipe #161 here,
Brazo de Mercedez with a big Twist recipe #196 here,

Custard Cream Filling
3/4 cup white sugar

1/3 cup flour

1 cup fresh milk
1 cup coconut cream

6 egg yolks, slightly beaten
Click here to get the procedure.

ENJOY!!

Monday, June 7, 2010

#244_Very Berry Brownie Fruit Tart

Sometimes called Fruit Pizza, this pie is to die for....
it's a real scrumptious dessert.


Serve a piece of this to each your guests and watch them
lick their forks, lick their fingers, lick their plates, smack their lips
or look at you crossed eyed
insinuating they want another piece.
Yes, it's that delicious....and guests are allowed to break some of
Emily Post's etiquette rules in this yummie situation.


This dessert is not only scrumptious, but it is truly, really easy to make...just open a box of brownie mix, follow the directions and you have a brownie base.

For this dessert I used a box of triple chunks brownie mix, but you can use any fudge brownie variety. One box makes two 10-inch plates with higher rims or you can make the brownie in one rectangular baking pan.

The cream filling is made of 2 boxes (3.3 oz.) of instant white chocolate pudding mix using 2 cups of milk, mixed with one bar of cream cheese in a food processor.... like the cream filling I use for Crema de Fruta, entry #28, only the amount of milk is decreased to 2 cups.

Here's the recipe for the Cream Filling:
2 packages (3.5 oz each) instant pudding mix*
1 package cream cheese, softened
2 cups cold milk
In a bowl beat cream cheese and set aside. In another bowl, beat pudding and milk until thick, ( food processor works best for this part) Add the cream cheese and continue to beat until mixture is smooth. Consistency should be like mayonnaise. Spread over cooled brownie.

*Note: you can use either 1 box instant lemon pudding mix and 1 box of white chocolate pudding mix...excellent combination or just use one kind)


Strawberries are slightly coated with some glaze made of Danish Desserts then arranged on top of the pudding. Put the dessert in the fridge to chill for at least 2 hours before serving.


Aside from the strawberries, other fruits I used are
kiwifruit, raspberries, and blackberies.
This fruit combination was an inspiration from a cake
by Jane Embry who is a
PinoyAmericanFavoriteRecipes fan on FaceBook,


Please take a bite!!!

Sunday, March 28, 2010

#232_ Pan de Coco or Coconut Rolls

Pan de Coco, Coconut Bread or Coconut Rolls,
they all mean the same thing...
bread filled with
Sweetened Coconut or
Bucayo.


I found it easier to fill the dough with the bucayo this way,
roll it up like jelly roll.
For the dough I used the Pan de Sal recipe #20, click here.


The rolls can then be sliced across to desired sizes.


The traditional way of making Pan de Coco
is to flatten each ball of dough
then put filling in the center,
gather the edges together then pinch to seal.


Serve Pan de Coco with hot cocoa...yummy!

Bucayo
(Sweetened fresh grated coconut)


For the Bucayo filling, I used the recipe of Virginia Ganzon Rodriguez who is a facebook friend and is so kind to give me the permission to post it here, but instead of posting it I'll just send you to her website to get the recipe, click here. It is a good bucayo recipe. The only thing that I changed in the recipe is the amount of water which I decreased to 1/4 cup and then I added 1/2 can of condensed milk when the mixture was almost dry, then cooked it just a little longer, about 2 minutes.
ENJOY:

April 28, 2010
As per request of Maricel, (see her comment below) here is the recipe for Bucayo, the filling for the Pan de Coco or Coconut Rolls which I copied from Virginia's website.

1 lb. brown sugar
Approx. 1/2 cup water
1 pack frozen grated coconut, thawed
1 tsp. vanilla extract

Cook sugar in water, then add the coconut and vanilla. continue to cook until the consistency is dry enough to fill the dough. Cool the mixture.