Tuesday, September 30, 2008

#12_ Mudslide Cookies

Mudslide Cookies
I call this emergency cookies because you can make a batch of this in under 20 minutes. It is super simple that it only calls for 3 ingredients and baking time is 9-12 minutes if you want soft and fudgey and gooey, 12 minutes if you want them crunchy. Its as easy as 1 2 3!

Ingredients:

1 box devils food cake mix

2 eggs

1/2 cup shortening

Procedure:
1. Pre-heat oven to 325 degrees. Line cookie sheets with parchment paper
2.In a bowl, empty the cake mix. Add the eggs and shortening. Mix until well blended
3. Roll dough into 1" to 1 1/2 " balls, (use an ice cream scooper for a more uniform size) and place them onto the prepared pan
4. Bake for 10- 12 minutes
5. Cool on racks

NOTE:
This will make about 2 dozen cookies or more
For the soft and fudgey kind, I bake them for exactly 11 minutes. The cookies will be really soft and will look like they are under bake at this point but once transferred on to the cooling rack to cool for a few minutes, they will be perfect. Ovens vary so you need to do a little experimenting.

Monday, September 29, 2008

#11_ Melt In Your Mouth Dessert

There was a contest at a company I used to work for years ago where an employee who turned in the most recipes wins. I placed second! Wasn't that great or what?!! Yah, big deal! Then they made a compilation of all those recipes submitted by us and published cook books and sold them to us, employees. Wasn't that clever of them?!!
In all seriousness though, the really good thing about it, aside from me garnering second place, is that most of my former co-workers who submitted recipes were really good cooks and their recipes are worth trying. I'm glad to have the cook book after all.
This dessert is from one of the emloyees there. It realy melts in your mouth and to die for!

Ingredients:

1 1/4 cup flour
1/2 cup butter, melted
1/2 cup walnuts, chopped
1 8 oz cream cheese, softened
1 cup powdered sugar
1 12oz cool whip
2 pkgs of chocolate pudding

Procedure:

1. Combine first 3 ingredients and press into a 9'x 13" pan

2. Bake for 15 minutes. Cool

3. Mix cream cheese, powdered sugar and half of the cool whip. Spread over crust

4. Mix chocolate pudding according to pie directions and spread over the cream mixture

5. Spread the rest of the cool whip over pudding mixture

6. Chill in the refrigerator for at least 2 hours

Sunday, September 28, 2008

#10_ Fried Tilapia Fillet


This is for my friend, Bobbi, who cooks her tilapia fillets in the microwave! Yup, Microwave! No wonder she said they taste awful. You don't cook fish in the microwave dear! I heat up my cold COOKED fish in the microwave. Microwaves are good kitchen helpers but they're just good for heating up food and such.

I thought maybe she'd come out today so I got a package of the fillets last night. After they thawed out, I rinsed and seasoned them with salt and put them back in the fridge and fried them today. This recipe is from my friend Aida who is a very creative cook.

There's 6 pieces of fillets in a package.
Other ingredients you'll need:
Eggwhites from 2 eggs
2 heaping TB cornstarch
Enough water to dissolve the cornstarch
Canola oil for frying


1.In a fry pan, heat some canola oil on medium low

2. Beat the egg whites and add some salt

3. Dissolve cornstarch in water and mix in with the eggwhites

4. Dip each fillet in the egg white mixture

5.Fry the fillets about 5-8 minutes on each side, turning once

Serve with your favorite sawsawan or condiments

#9_ Tortang Talong and Fried Zucchini


My friend Liza had a birthday luncheon for her husband and among the many dishes she served was the Tortang Talong. Wish I had brought my camera with me because I don't think I can duplicate her presentation. It was so impressive and beautiful that I felt like I didn't want to dig in. It's a good thing somebody else dug into it first.

Tortang talong is not new to me as it is a childhood viand and I've always fixed it for myself since I left home. But never thought of the idea of accompanying it with relish of mangoes and tomatoes. It is an ordinary dish but when dressed up, is so enhancing. She said she got the idea from a newly opened Filipino restaurant (only one in the valley) where they went to eat the week before.

Today, I'm not even going to attempt to present it like she did...maybe a little close, just to give you an idea. I will throw in some fried zucchinis as I have one sitting in the fridge from a friend's garden. About those fish on the platter...they're breaded catfish from Texas Road House where we had dinner last night. I'm not a meat person so that's what I always order when we go there. Yah, you're right, sistah! that's a platter full of grease! As Aida always says "nakakamatay".....hindi bali we only live once. We oughta eat what we enjoy eating once in a while!

You'll need:
3 medium size Japanese eggplants
2 eggs (or more)
salt
canola oil


For the Relish:
1 Medium size tomatoes
1 ripe mango
alamang na bagoong
Onion, chopped (optional)
Cilantro, chopped (optional

Procedure:
1. Turn the oven to broil
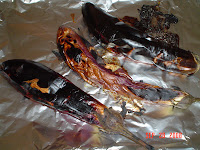
2. Make few pierces on the eggplants with tines of a fork. Put the eggplants on a cookie sheet lined with aluminm foil (for easy clean up)and put it under the broiler (top rack), turning them around as they get charred so all sides get broiled evenly. Peel off the charred skins
3. Beat the eggs and add some salt
4. In a fry pan, heat some oil
5. Dip each eggplant into the beaten eggs pressing down with a fork to flatten them
6. Fry each side in hot oil, turning just once
7. Drain on paper towels

NOTE:
Actually, I fried the zucchinis first which have been cut diagonally. Its exactly the same procedure as for frying the eggplants...dipping each slice in the beaten eggs, fry each side in hot oil, turning once. I even used the same pan and oil for frying the eggplants. Choose zucchinis that are young and tender and don't need to peel them.

Thursday, September 25, 2008

#8_Tomatoes, tomatoes, tomatoes

I planted a couple of tomato plants this year but they didn't do very well. Anyway, friends and neighbors have been bringing me some so I ended up having plenty.
What would you do if you have surplus of tomatoes aside from making salsa? Well, I usually prep them and put them in plastic containers and freeze them, so I have some ready when recipes call for tomatoes like afritada, escabeche, menudo, sarciado, spaghetti sauce, etc. All I need to do is thaw out one container in the microwave. This is also a big time-saver as it cuts down my prepping and sauteing time by half. Life in the fast lane, right?

For 5 lbs. ripe tomatoes, you'll need:
1 head garlic, minced
2 large onions, chopped finely
Canola Oil

1. Cut up and chop the tomatoes
2. In a large skillet, heat some oil
3. Lightly brown the garlic
4. Add the onions and continue to saute until they're translucent
5. Stir in the chopped tomatoes and continue to saute. Put lid on and let simmer, stirring occasionally, for about 20 minutes until the the liquid has reduced to almost dry
6. Let cool
7. Store cooked tomatoes in containers then freeze.

Wednesday, September 24, 2008

#7_ Biko ( Rice Cake)

In Pangasinan, this is BIKO. I know that different regions in the Philippines have different names and versions for this kakanin, but for me, this is "the" BIKO and I'm sticking to it!


Originally, Biko is topped with ganosal, in Tagalog, latik, which is the curdles from the coconut milk when making coconut oil. Well, there were two reasons I didn't make latik for the topping: One, I don't know how to make it. Two, I know it is so tedious to make it because I had seen my mother make them all the time and I don't have any interest whatsoever in learning how to make it. My friend, Aida, substitutes toasted coconut for the latik. It's a very good substitute and in fact it's as good as the latik if not better. Personally, I like the toasted coconut better because it gives crunchiness to the BIKO.

This version of biko is from my friend Gloria. There is no soaking the malagkit in water for hours,(which causes the grains to break up when cooked). You don't need to cook the sugar and coconut milk on top of the stove. This is very easy to make and yet its very good and it is the way I like biko to be, not mushy and the grains retained their shapes, they are not broken up to pieces. I've been doing it wrong until just recently Gloria told me to fully cook the malagkit. I cooked it that way today and also my water-malagkit ratio was precise. It came out so perfect!

Ingredients:
4 cups malagkit
4 cups water
1/2 can coconut milk (updated)
2 cups DARK BROWN sugar, firmly packed
Sweetened Flaked coconuts, toasted (optional)

Procedure:
1. Rinse the malagkit and cook it in rice cooker with 4 cups water
2. Grease a 9"x13" baking dish with butter and line it with a piece of banana leaf. Grease top of banana leaf also.
3. When the malagkit is fully cooked, turn power off but leave the malagkit in the rice cooker pot. In it, while the malagkit is still hot, add the coconut milk and the sugar stirring well but gently until everything is all blended together.
4. Spread the mixture in the prepared pan. Do not press down, just smooth the top out
5. Bake in a pre-heated 350 degrees oven for 50 minutes to 1 hour.
6. Sprinkle toasted flaked coconuts on top.

Related posts:
Nilatikan>>>>>http://pinoyamericanrecipes.blogspot.com/2009/01/64glutinous-rice-cake-with-topping.html
Biko:>>>http://pinoyamericanrecipes.blogspot.com/2011/04/291mango-sticky-rice.html

Notes from MaMely:
I found that using dark brown sugar brings better result. Taste, texture and color are better. No, there's no taste of molasses. The amount of water used in this recipe is the key. Make sure the ratio is 1:1

Lining the bottom of pan with banana leaf is optional.

Tuesday, September 23, 2008

#6_Hawaiian Cake

Hawaiian Cake Topped with Cool Whip
(New picture)

I used pineapple tidbits and chopped pecans on this one

I got this recipe from a lady I used to work with years ago. We used to have cake & ice cream party for birthdays every month where employees brought cakes or cookies and the company provided the ice cream. People brought a lot of good stuffs and this cake was one of them.

Recipe:

1 box Yellow Cake Mix
5-6 Bananas
1 box (3.4oz) instant white chocolate pudding mix
1 box 3.4oz) instant lemon pudding mix
3 cups cold milk (fresh milk)
1 (8oz) Cream Cheese, softened
1 (20 oz) can crushed pineapple or tidbits, well drained
1 ( 8oz)Cool Whip, thawed out
Chopped nuts
Toasted coconut, optional

Procedure:

1. Bake cake according to package directions in a 11"x15"x2" cake pan. Let cool
2. Peel and slice bananas and line them on the cake
3. In a mixing bowl, beat cream cheese. Set aside
4. In another bowl, combine the cold milk and the two puddings. Beat until thick. (This will take awhile if using hand mixer. Food processor works really well. To this, add the cream cheese and continue to mix until everything is well blended together
5. Spread the pudding over bananas
6. Spread drained pineapple on top of pudding
7. Top with Cool Whip or whipped cream
8. Sprinkle nuts or coconuts on top

(new pictures)

Notes from MaMely:
1. You can spread the cool whip topping on top of pineapple or slice up the cake and top each slice with the topping as you serve them
2. Make sure to beat the cream cheese separately from the pudding, otherwise you'll have a lumpy mixture. Made that mistake the first time I made it.
3. A whole brick of cream cheese can be softened in the microwave for 25-30 seconds. Make sure to take the wrapper out!

Update:
Ever since I've mastered making chiffon cake, I been using chiffon cake in this recipe in place of the yellow cake mix. It taste a lot better.

Sunday, September 21, 2008

#5_ Beef Stew


I fixed some beef stew for my hubby for Sunday dinner. I fixed enough so if someone drops by we can have enough for two. I had some kare-kare which I cooked yesterday for a birthday luncheon. I saved some for me before I took it to the party. I will post the recipe of the kare-kare another time.

This beef stew takes more than 2 hours to cook on top of he stove, but with the slow cooker, you can put everything in the pot and do something else... like go see 2 movies while the stew is cooking.

Ingredients:
2 lbs. beef for stewing, or beef chuck,cut in cubes
1/4 cup flour
1 Tb. Season All ( seasoned salt)
canola oil
5 cups water
10 pickling onions
2 cloves galic, smashed
1 Tb sugar
1 Tb worcestershire sauce
1 tsp paprika
2 bay leaves
Dash of Allspice
Salt and pepper to taste
3 carrots, silced diagonally
5 medium potatoes, peeled and cubed

Slow cooker method:
1. Mix the flour and the Season All. Dredge the cubed beef with the mixture or put the meat and the flour in a paper sack and shake it
2. Heat some oil in a non-stick skillet and brown the meat, few at a time, on all sides. Drain them on paper towel.
3. Put the browned meat in the crock pot along with the rest of the ingredients.
4. Put the lid on and set the temperature on LOW. This will take about 6 hours

Stove top method:
1. Follow procedures 1 and 2
2. Put the browned meats in a large skillet and add water, onions, garlic, sugar, salt and pepper,worcestershire sauce and allspice
3. Put the lid on and simmer for about 2 hours, stirring occasionally to prevent sticking. When meat is tender, add the vegetables and continue to simmer for another 30 minutes or until the potatoes are tender.
4. Discard the bay leaves before serving
ENJOY!!

Sunday, September 14, 2008

#4_ Amy's Ziti Pasta Salad

We had small get- together dinner today at one of our daughter's place. Why did I say "small"? That's because there's only me, hubby, daughter Amy and her family and the host family, Angela, Brian and Benjamin. For the Johnson family, that's just a small group.

I made the Pistachio Salad. Angela and Brian prepared Deli Sandwiches using french breads filled with deli meats, cheeses, etc., then sliced across depending how thick you want it. So it was custom slices or you may say cut by design. Amy made her famous Pasta Salad, the recipe of which I'm going to post. Everybody must have been so hungry everything was gone!

Ingredients for the Pasta Salad:

1 lb. pkg. ziti pasta, cooked
6 slices bacon, cooked, chopped
3 small carrots, coarsely grated
1 green pepper, finely chopped
1 small onion, minced

Dressing:
1 1/4 - 1 1/2 cup miracle whip or mayo
2 TB white sugar
1/2 tsp. garlic salt
2 TB bacon grease

Procedure:
1. In a large bowl mix the cooked pasta, the green pepper, onion, carrots and the bacon
2. In another bowl, mix the miracle whip or mayo, sugar, garlic salt and the bacon grease
3. combine together and chill in the fridge

NOTES:
To cook pasta AL DENTE:

You need about 5 qts water for a 1 lb of pasta and a large pot to accommodate this much water. Bring water to a rapid boil. Add 1 TB salt and 1 TB olive oil. Gradually add the pasta and cook for 14 minutes. Its a good idea to use a timer to avoid over cooking your pasta.

To check for doneness, take a piece of pasta and break it. (This is how I always test my pasta). If you you don't see any white spot, its perfectly done. Or you can always use your taste bud by taking a bite. When there's no more taste of raw flour and is biteable but not crunchy or rubbery, then the pasta has reached AL DENTE state.

Take pasta out and drain thoroughly in a large colander stirring occasionally so they won't stick together. According to some culinary experts, never rinse the pasta because the sauce or dressing will slide off the pasta. You want the sauce to stick to the pasta!

How to cook the bacon:
You can cook the bacon two ways:
1. Cook it in a fry pan on top of stove
2. Or in the oven..
Pre heat oven to 350 degrees. Place a piece of aluminum foil on a cookie sheet (for easy clean up) then line the bacon strips on the foil and bake it for about 20 minutes or till the bacon turn brown and crisp.

Friday, September 12, 2008

#3_ Pistachio Fruit Salad

This is really an easy fruit salad to prepare, even a child can prepare it. I always serve this during holidays but you can serve it anytime you want. Its really good!

You'll need:
2 cans ( 16 oz ea.) fruit cocktail
1 (20 oz.) can pineapple tidbits
2 boxes (3.4 oz.ea.) instant Pistachio pudding mix
1 tub (12 oz.) Cool Whip, thawed

5 bananas (or more)

How to prepare the Salad:


1. Pour the fruit juices in a bowl and stir in the pudding mix.
2. Mix the fruit cocktail and the pineapple tidbits in to the pudding mixture.
3. Fold in the cool whip
4. Cover with plastic wrap. Chill for at least 2 hours.
5. Just before serving, peel and slice up the bananas and mix it with the salad.
How easy is that

Note:
For variations, you can add miniature marshmallows (it has to be the white marshmallows. I used pink ones one time and the color was a disaster). You can also add some coconuts or chopped walnuts or pecans. You can't really go wrong with this salad.


Thursday, September 11, 2008

#2_Ginisang Upo


What is UPO?!! For those of you who aren't familiar with UPO, you might think its an acronym for something. No, these three letters are a word for a vegetable! Yes, very short name for a long size vegetable. They can be as long as two feet when mature and are similar to zucchinis. According to the Philippine Medicinal Plants, by Godofredo Stuart, one of its scientific names is LAGENARIA SICERARIA. Upo's other names are bottle gourd ( Engl.), white pumpkin
( Engl.), Hu-lu (Chin), and others.

There are several ways to cook Upo but my favorite is with shrimps and alamang na bagoong....it must be the Pangasinan and Ilocano blood in me. My friend Erlinda and her family grow them every year along with other plants in their backyard. This summer they gave me one which was more than 2 feet long. In Utah, this is a real treat as this kind of vegetable is scarce.

How to cook the UPO:

First, prep the veggie by cutting both ends off then depending on the size, cut it into quarters crosswise. Take the quartered pieces and cut them into quarters again, but this time, lenghtwise. Scrape out the white part inside where the seeds are hiding, then using a vegetable peeler, peel the skin off each piece and slice them thinly across. It is more time consuming to prep this veggie than to cook it, but its all worth the effort. When cooking I just eyeball the amount of ingredients. You can't go wrong with this dish.

Ingredients:

Cooking oil
Sliced upo
Shrimps, cleaned and deviened
Garlic, minced
Onion, finely chopped
Bagoong na alamang

1. In a large skillet or wok, heat some oil and lightly brown the minced garlic
2. Stir in the onion and saute until they turn transluscent
3. Toss in the shrimps and continue to saute for about a minute
4. Stir in the sliced upo and the alamang na bagoong, continue to stir until all the ingredients are well blended together. Put the lid on and simmer until the upo are wilted and cooked, stirring occasionally.

Note that I didn't put any liquid in, that's because the upo will render some liquid in the process. Adding liquid will result to a "soupy" dish.

Note from MaMely:
Light up a scented candles while cooking this dish so the amoy ng bagoong will not linger around the house. It works every time I cook something with bagoong.


My friend, Erlinda harvesting Upo
in her backyard for me.

Wednesday, September 10, 2008

#1_ Gregg's Favorite Hamburger Casserole

This is one of those QUICK & EASY recipes. I can't tell you where I got the recipe from, I wish I can. All I know is that I acquired it somewhere. I've had it for a while and it 's been Gregg's favorite. You'll notice here that I didn't use any salt. That's because the soup has 30% sodium per can. That's a lot of salt! Plus the salt from the cheese, not to mention the salt in the corn.

INGREDIENTS:
1 med size onion, minced
3 lbs. ground beef (80/15)
2 cans tomato soup
2 cans water, (use the soup can to measure)
1 can whole kernel corn
3 cups shell pasta or ziti,uncooked
1- 8oz. tomato sauce
1 cup grated sharp cheddar cheese
1 cup grated mozarella cheese
1 can olives, sliced
PROCEDURE:
1. Heat a skillet. Without using oil or water, brown the hamburger with the onion, stirring ocassionally. Drain the meat in a collander and discard any liquid/grease left in the skillet.
2. Put back browned meat in the skillet and to it add the tomato soups, water, tomato sauce and the pasta. Mix all together, cover and cook over low heat for 10 minutes.
3. Add the corn and olives and mix to blend well
4. Pour mixture in a baking dish and bake in 350 degrees oven for 45 minutes.
5. Take out from oven and sprinkle the cheese on top. Put it back in oven and continue to bake for 5 minutes or till cheese are melted.

You can prepare this dish ahead of time even the night before. Follow procedure down to 4 but donot bake it. Instead, cover with plastic wrap and put it in the fridge and pop it in the oven when you're ready to bake it.

How I started My Recipe Collection

September 9, 2008

I started collecting recipes way back in the 70's when I developed a passion for cooking. My sisters and I enjoyed cooking and experimenting on these RECIPES, and we still do. The only thing that I regret is that we didn't set our hands on our own Filipino cooking which we left to our dear Nanay because that was her expertise. So I guess we didn't want to compete with her. Everybody enjoys her cooking even up to the present time.

When I arrived here in the US, I missed her cooking...her dinengdeng, tinola, egado, adobo, atbp. Mga kakanin like biko, suman with katiba, etc. How I missed those goodies! I always yelled out for help! I'm so lucky to have friends and family around who are always willing to share their recipes with me. My sisters (Melita and Melinda in NZ and Mila in Pinas) always get so excited to share with me their new discoveries. Then I have my mother...I often called her up ( I still do sometimes ) just to ask her how to cook "this" and "that"...dishes that I took for granted when I was home. She didn't only give me her recipes but also her secrets and techniques and her wisdom. She gave me in-depth explanations on how to prepare her dishes. It was like a "tutorial cooking" over the phone. Talk is "cheap" now but not then and we love to talk about food as well as eating! The same is true with my sisters and friends. After the initial "kumusta?", blah-blah-blah, "anong ulam?", we always end up talking about food until dinner the next day! Of course that's an exaggeration! but it always seems that way if you enjoy what you're talking about.

These recipes I'm posting on this blog reflect my friends' and family's LOVE for food. Who doesn't, anyway?!!


Just as it states on the header, my purpose in creating this blog is to share these RECIPES to our kababayans out there who are away from "home" and missed their mom's home-cooking as I did. I have plenty of recipes collected over the years, but I will post only the ones that have been tested and tried either by me, my friends or my family. Most of these recipes are simple to follow. Some have been modified due to unavailability of ingredients in the area yet remain FAMILY FAVORITES for years.


I'd like to thank my friends, family, my dear husband Gregg, children and grandchildren who always make me feel like I'm a great cook. I'm not really, but I appreciate all of them. They make me feel good.

Hope you enjoyed your visit to my kitchen. Please come back anytime. Remember, when you're here, you're a FAMILY!

Maraming salamat po sa inyong lahat!

MaMely

P.S.
One of our sons-in-law, Brian, always call me "MaMely". I like that because its very endearing to me.